Depth Charge
We're picking up something on our scanners...is that...an arcade game?!
Duration: Nov. - Dec. 2019
Team: Solo project
Tools: SolidWorks, Arduino
My contributions
Designed a one-click arcade game on an Arduino Circuit Playground
Iterated through 5 physical prototypes using foam core and laser-cut cardboard
Modeled and printed an arcade cabinet to house embedded electronics and hardware
Battle stations! 💥
CS 8803 - Physical Prototyping for HCI introduced me to the world of foam core, laser-cutting, and 3D printing. For my final, I was challenged to use those tools to create an interactive housing for an Adafruit Circuit Playground.
The circuit board’s ring of LEDs reminded me of a submarine’s radar display, so I decided to make a game out of it!

Objectives
01
Design an interactive experience with an Adafruit Circuit Playground
02
Fabricate a 3D-printed housing for the electronics
Process
01
Sketches
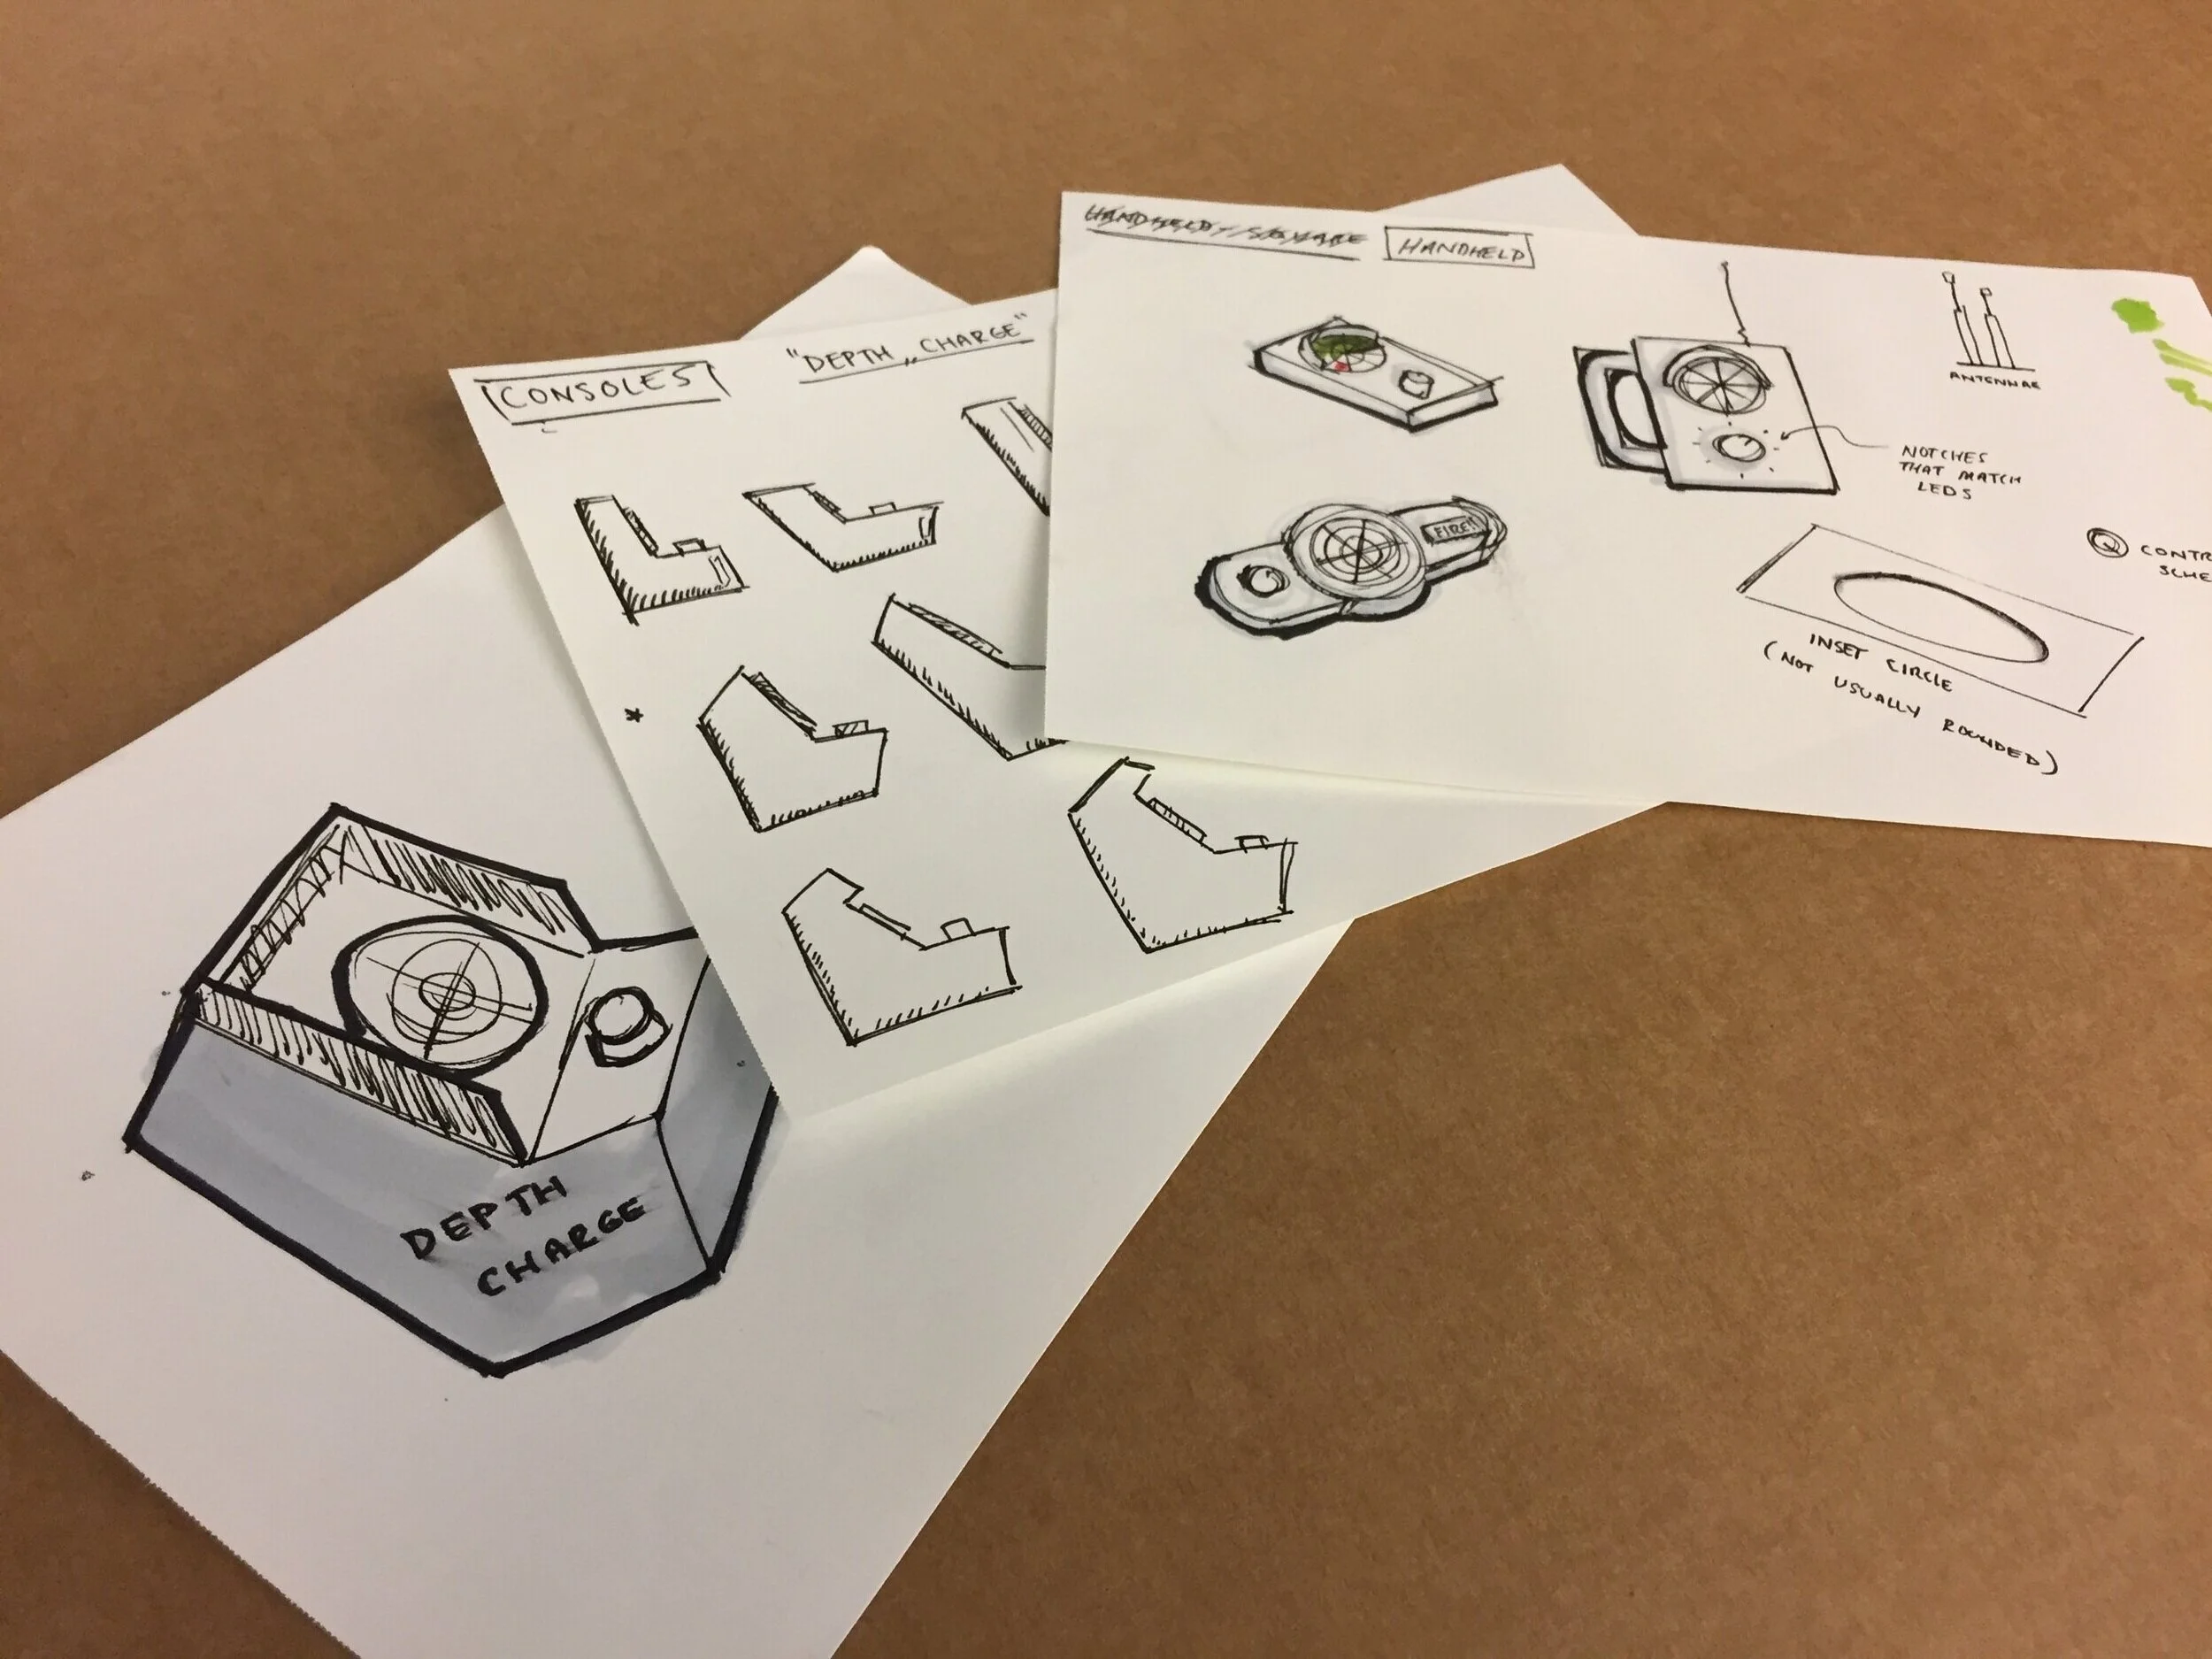
Initially, I explored both handheld and tabletop variations of the radar display. Based on early critiques, I opted for the tabletop representation since it better resembled a traditional submarine console.
02
Functional prototypes


Early on, I put together some quick code prototypes to test lighting effects and interaction methods. I found that a clickable knob made for a great controller because it supported radial selection in a very compact space.
03
Sketch models
I started working with foam core to determine the rough outer dimensions and geometry of the console. I then converted these prototypes to 3D models to produce laser-cut cardboard iterations.
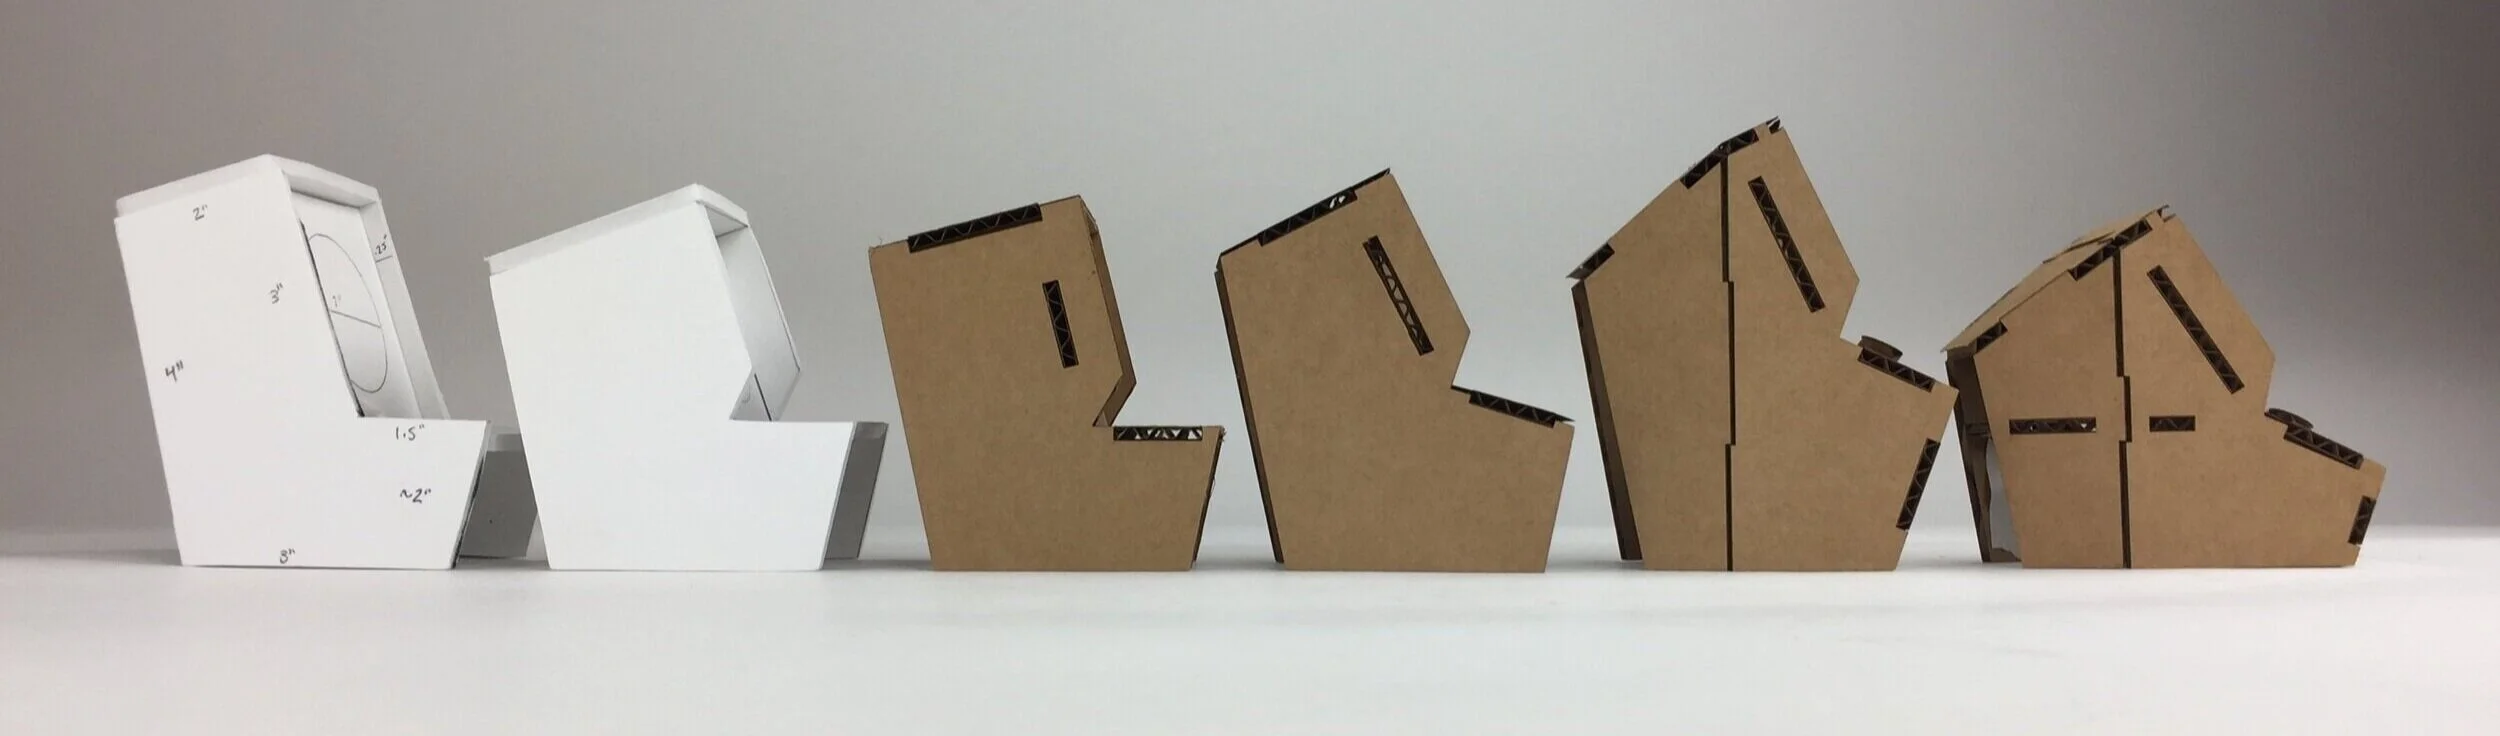
Some key variables that I explored were the angle of the display surface, the angle of the interaction surface, and the taper on the back of the console.
04
Digital modeling

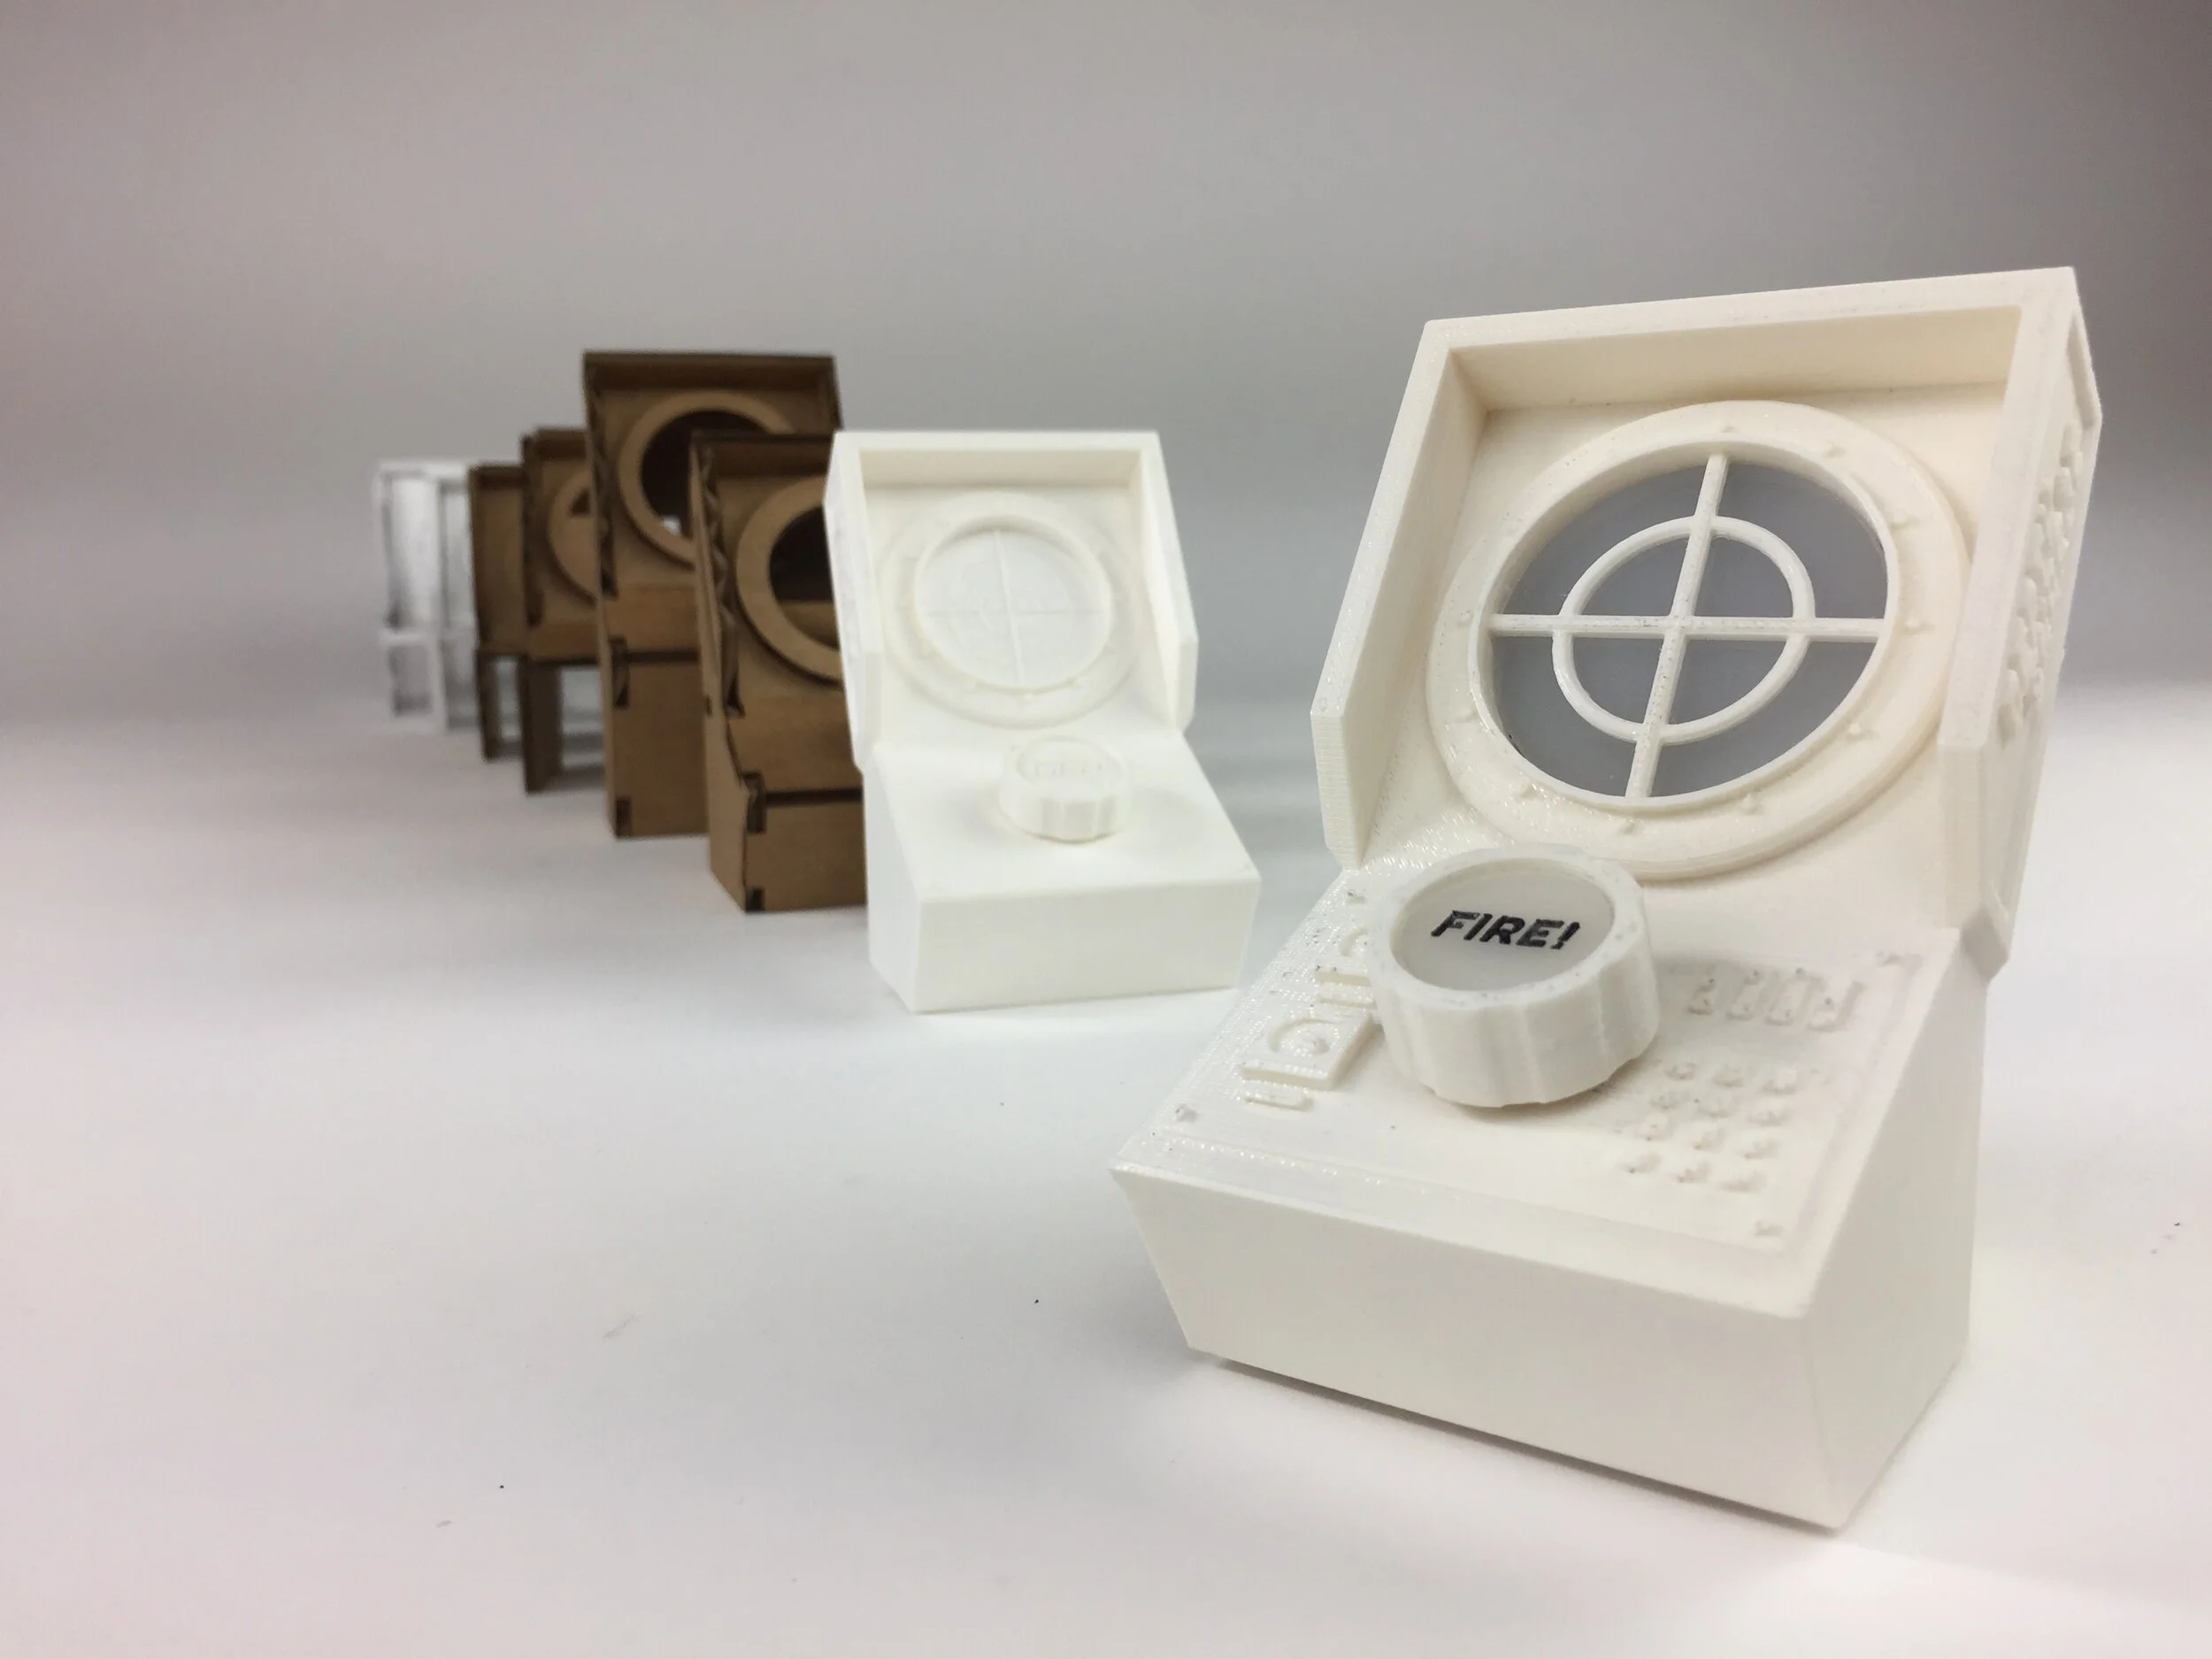
After my final cardboard iteration, I remodeled the console in SolidWorks as a 3D-print-ready file. This included modeling all of the hardware in a full assembly to plan out the appropriate spacing.
05
Test print
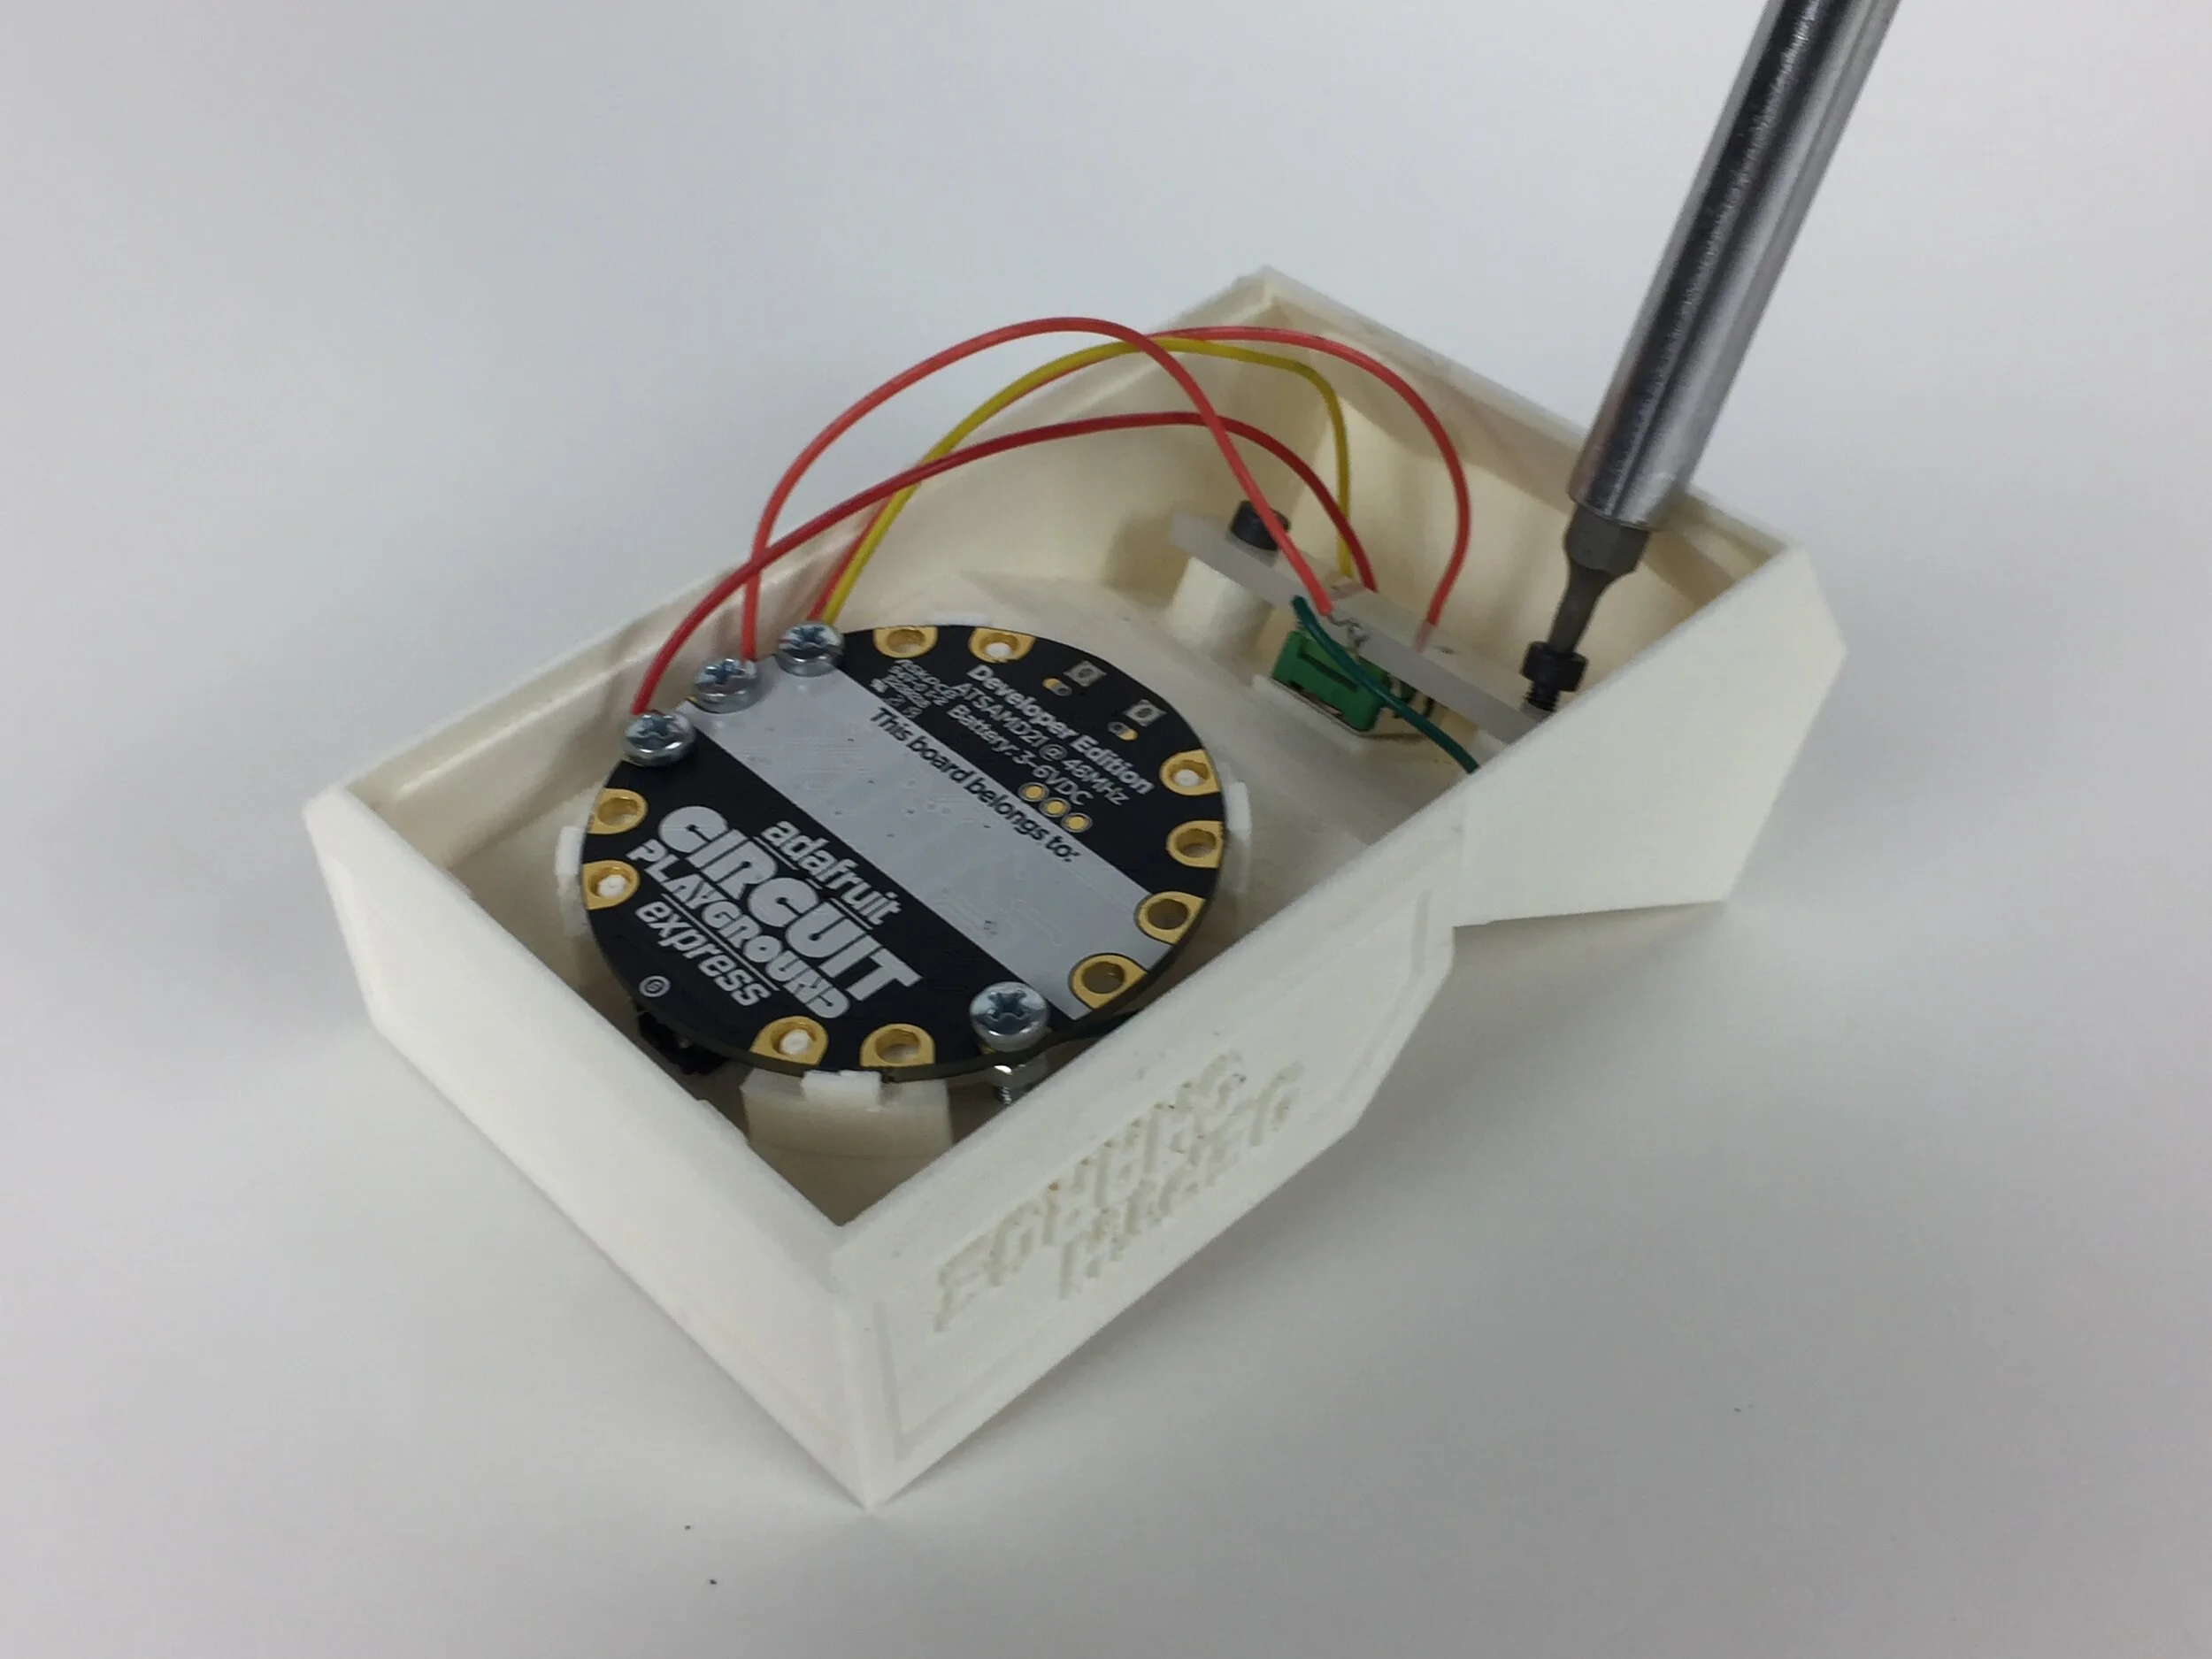
My first print of the console only included the front panel, which allowed me to test out how the hardware fit together (spoiler: everything was wonky and I had to redo it 😅).
Final design
Gameplay demo
Design features
The front and rear panels snap together for easy access to internal electronics. This was required in the assignment spec.
The Circuit Playground is oriented towards the player behind an acrylic disc, which allows its LEDs to shine through.
The Circuit Playground and knob are firmly secured with removable bolts and snaps to support reuse.
Rubber feet prevent the model from slipping during intense gameplay.
A rear access point supports USB charging in a thematically-appropriate manner.
Wrap-up
Despite its small scale, Depth Charge set plenty of huge personal milestones for me:
First time using CAD
First time 3D printing
First time completing a full iterative design of a physical product
Looking back, this project really sparked my interest in making, and I’m grateful to Noah Posner and the Interactive Product Design Lab for putting industrial design on my radar.
Thanks for reading this! 🙌